
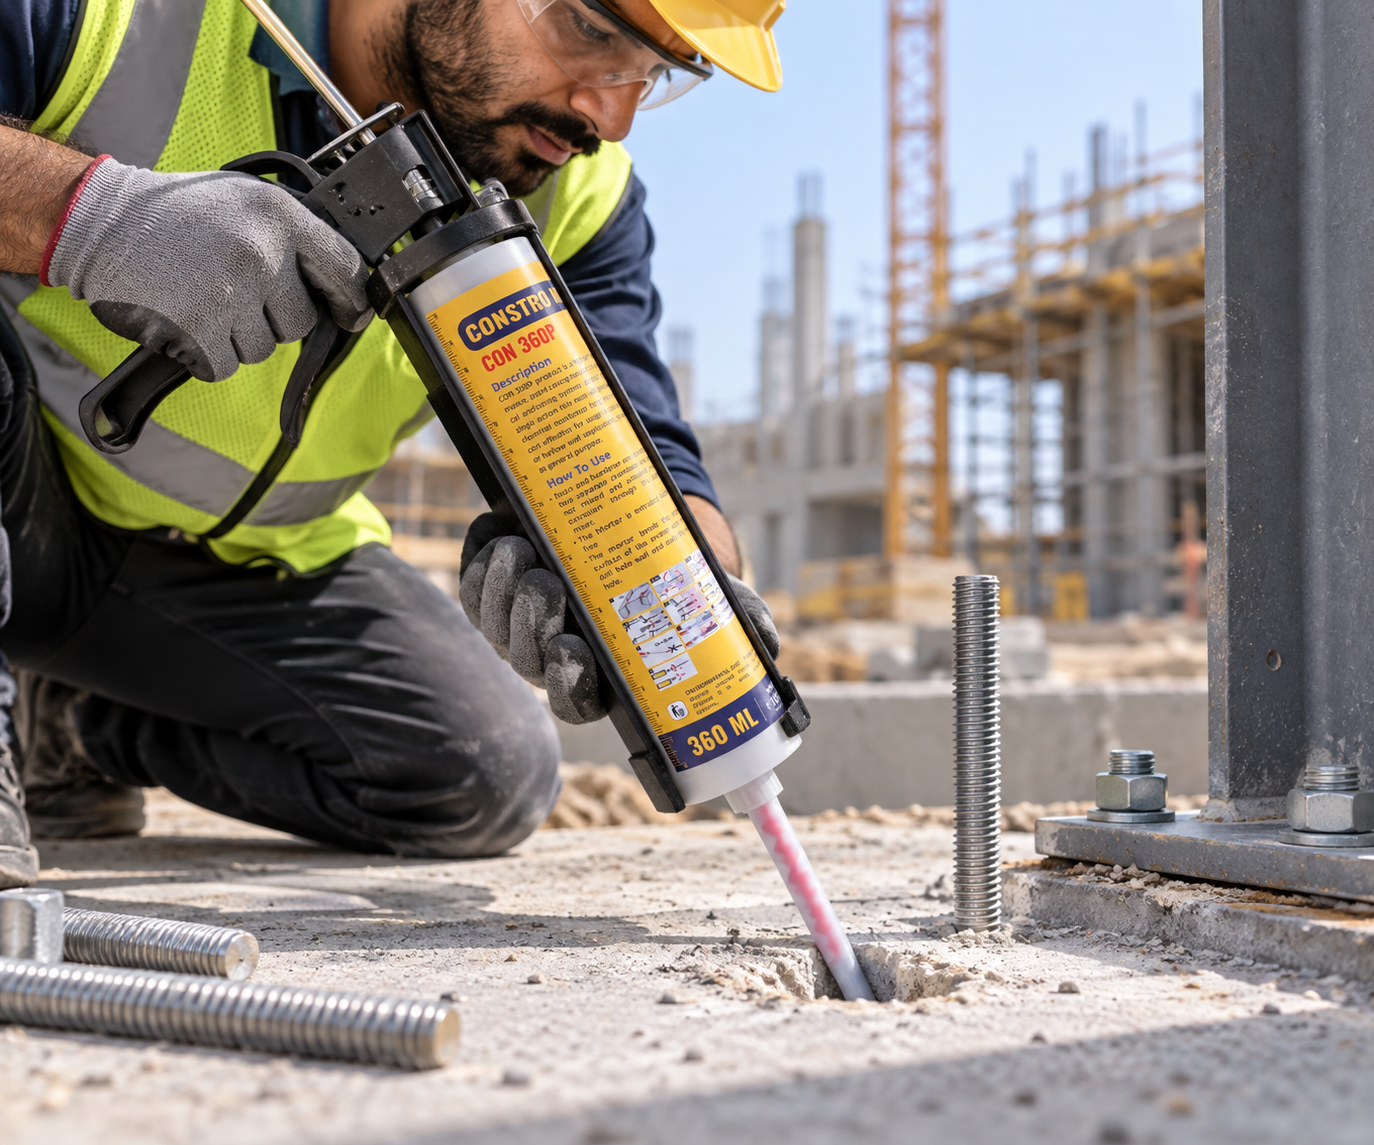
 Chemical Anchor Installation: Step-by-Step Guide for Concrete
Installing a chemical anchor correctly is essential for creating a strong and reliable connection between concrete and components such as threaded rods, rebars, steel brackets, machinery supports, railings and other structural elements.
Unlike mechanical anchors, which typically rely on expansion or mechanical engagement, a chemical anchor uses a resin-based anchoring adhesive to bond the anchor element to the surrounding concrete.
However, the performance of a chemical anchoring system depends heavily on proper installation. Drilling the hole is only the first step. Correct hole diameter, thorough hole cleaning, proper adhesive mixing, accurate resin injection, correct anchor insertion and sufficient curing time all play an important role.
In this guide, we explain how to install a chemical anchor in concrete step by step, what tools and materials are required, common installation mistakes to avoid, and the factors that can affect anchoring performance.
Important: Always follow the installation instructions and technical documentation provided for the specific chemical anchor system being used. Hole diameter, embedment depth, resin quantity, working time and curing time can vary between products.
Chemical Anchor Installation at a Glance
The basic installation process can be summarized as:
Mark → Drill → Clean → Inject → Insert → Cure → Tighten
Each step needs to be completed correctly to achieve the intended anchoring performance.
The exact installation procedure can vary depending on the resin type, anchor element, concrete condition, installation temperature and product specifications.
What Is a Chemical Anchor?
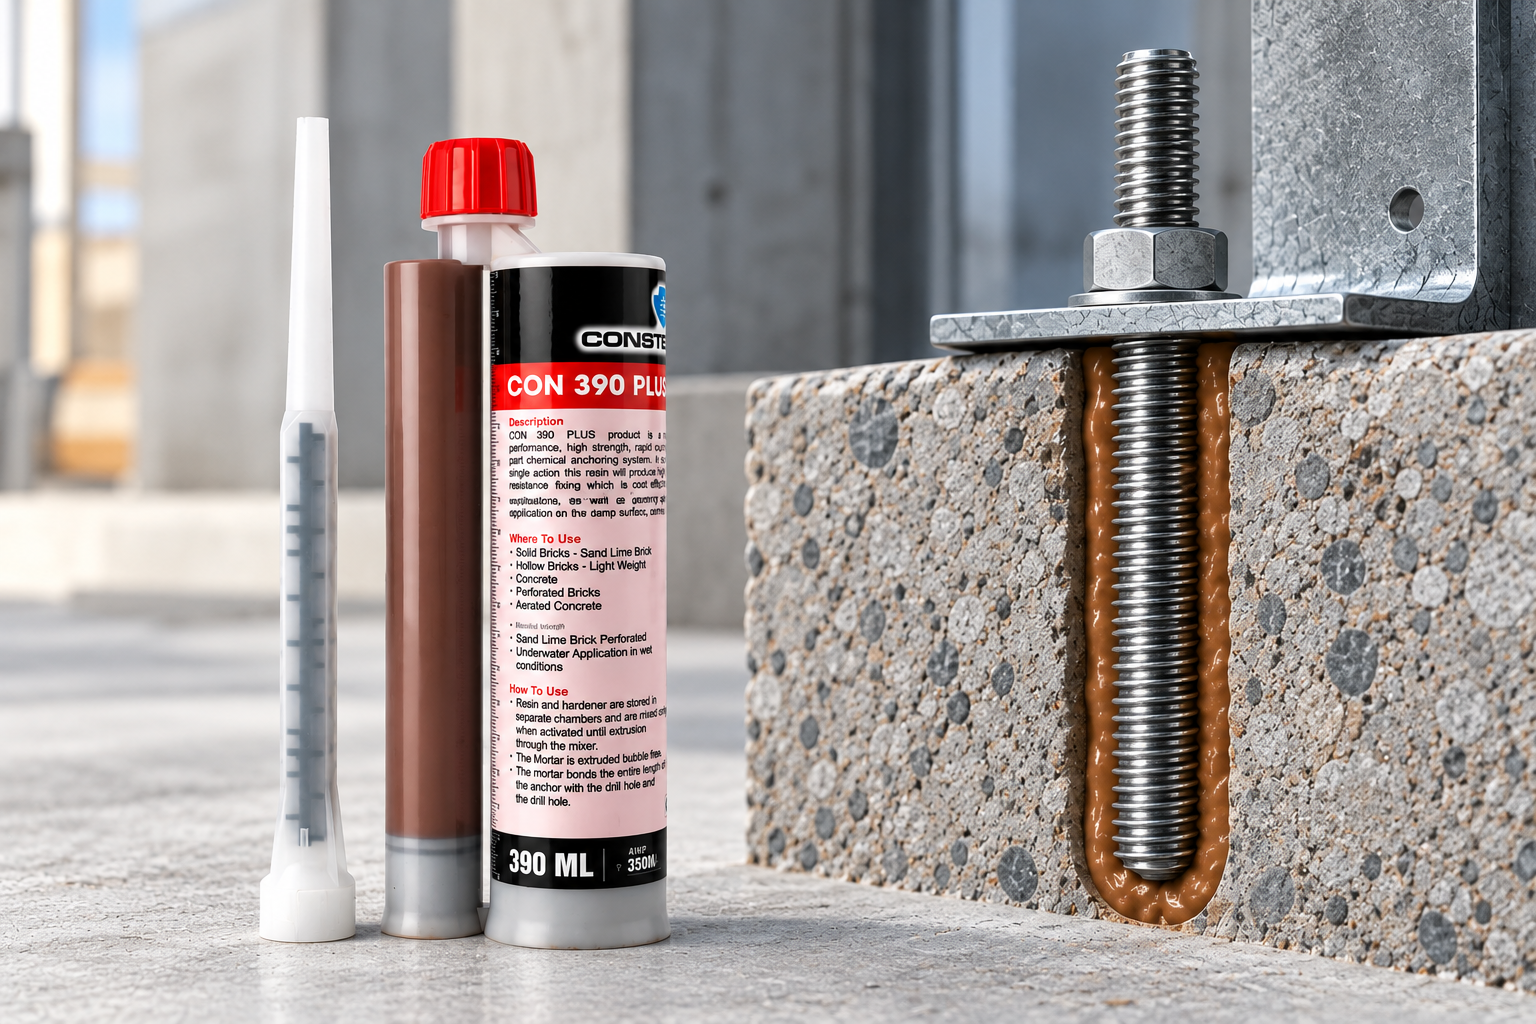
A chemical anchor is an adhesive anchoring system used to secure threaded rods, rebars and other approved anchor elements inside drilled holes in concrete.
Instead of relying primarily on mechanical expansion, the system uses a resin-based adhesive to create a bonded connection between the anchor element and the surrounding concrete.
The resin is injected into a prepared hole, after which the threaded rod, rebar or approved anchor element is inserted. Once the adhesive cures, it forms a bond between the anchor and the concrete.
Chemical anchoring systems are commonly used for:
- Threaded rod installation
- Rebar dowelling
- Steel structure connections
- Handrails and guardrails
- Machinery and equipment supports
- Structural retrofitting
- Brackets and supports
- Concrete-to-steel connections
- Fixing structural components to concrete
The appropriate chemical anchor should be selected according to factors such as the concrete condition, required load, embedment depth, environmental conditions, anchor element and manufacturer’s technical specifications.
Chemical Anchor vs Mechanical Anchor
Chemical and mechanical anchors use different methods to transfer loads into concrete.
|
Chemical Anchor |
Mechanical Anchor |
|---|---|
|
Uses a resin-based adhesive |
Uses mechanical expansion or engagement |
|
Anchor element is bonded to the concrete |
Anchor is mechanically engaged with the substrate |
|
Requires proper hole cleaning |
Installation requirements depend on the anchor type |
|
Requires curing before loading |
Typically does not require adhesive curing |
|
Commonly used with threaded rods and rebars |
Available in several mechanical anchor designs |
|
Available in different resin formulations |
Available in different mechanical configurations |
Neither system should be selected based only on convenience. The appropriate anchoring method depends on the substrate, load requirements, embedment, environmental conditions and project specifications.
Tools and Materials Required for Chemical Anchor Installation
Before beginning the installation, prepare all required tools and materials.
Tools
- Rotary hammer or suitable drilling machine
- Correct-size masonry drill bit
- Hole-cleaning brush
- Blow-out pump or suitable compressed air system
- Chemical anchor dispensing gun
- Static mixing nozzle
- Measuring equipment
- Torque wrench, where specified
Materials
- Chemical anchor cartridge
- Threaded rod, rebar or approved anchor element
- Appropriate nuts and washers
- Personal protective equipment
The required drill diameter and embedment depth should always be determined from the technical documentation for the specific chemical anchor and anchor element being used.
Do not rely on a generic hole diameter or embedment depth.
How to Install a Chemical Anchor in Concrete
Step 1: Check the Concrete and Mark the Location
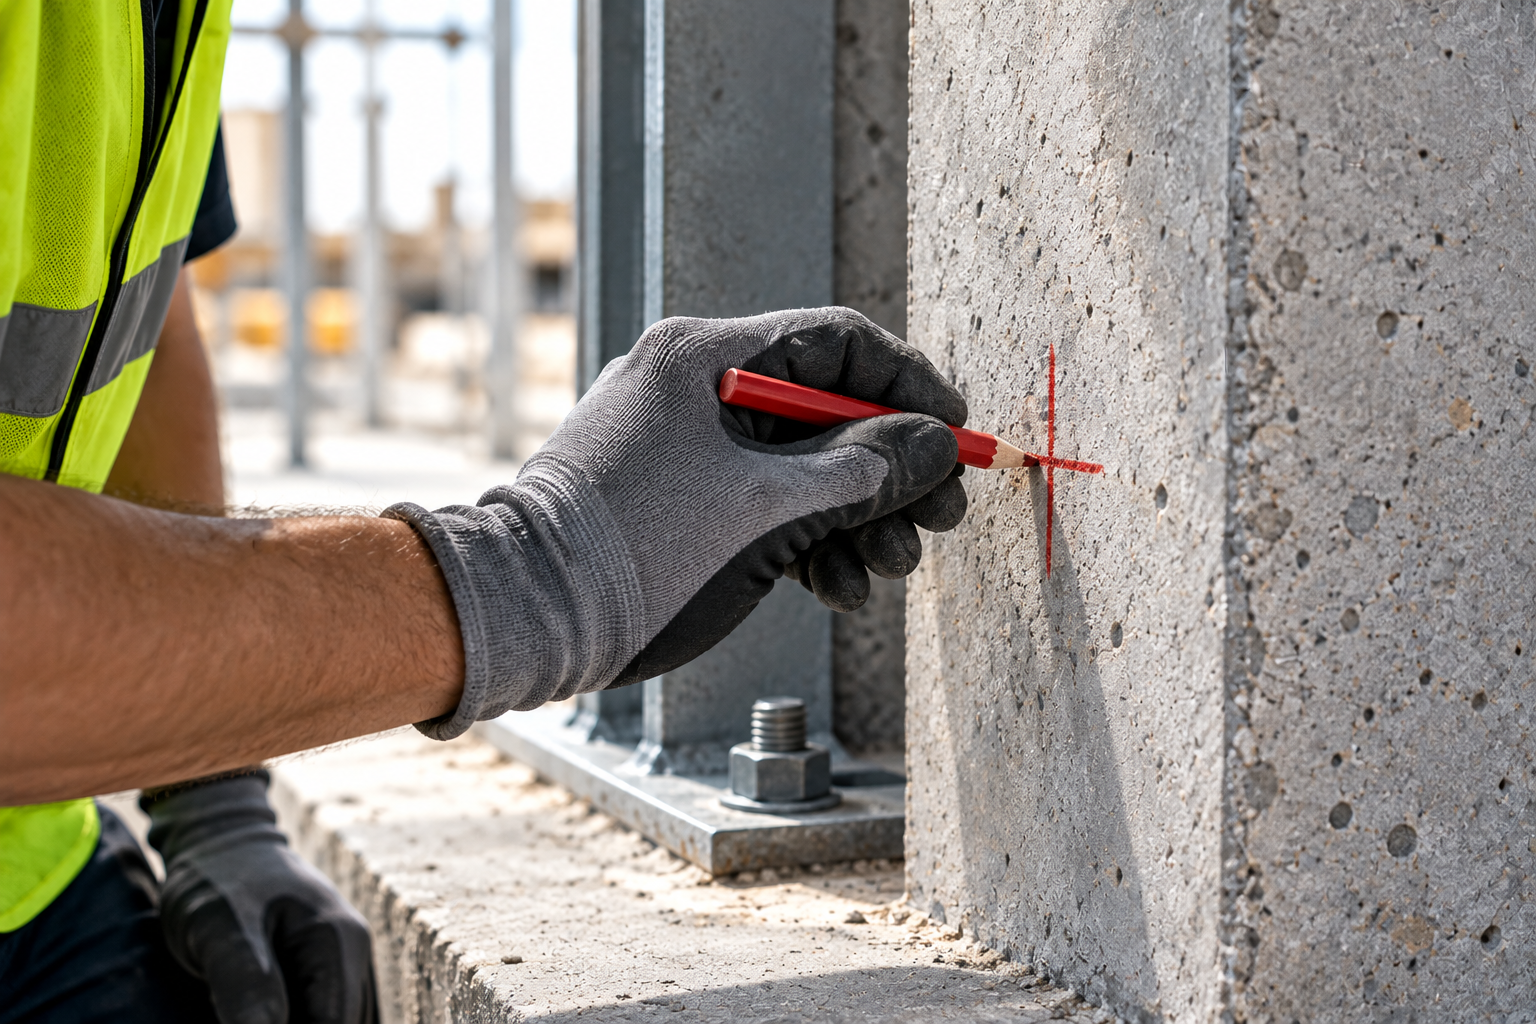
Before drilling, identify the exact location where the chemical anchor will be installed.
Inspect the concrete and make sure the proposed anchoring location is suitable for the intended application. Consider the condition of the concrete, edge distances, spacing and other project requirements.
For structural or safety-critical applications, the substrate condition and anchoring design should be verified by a qualified professional.
Mark the drilling location clearly.
Avoid drilling into reinforcement or embedded services unless the installation has been specifically designed for that condition.
Step 2: Drill the Hole
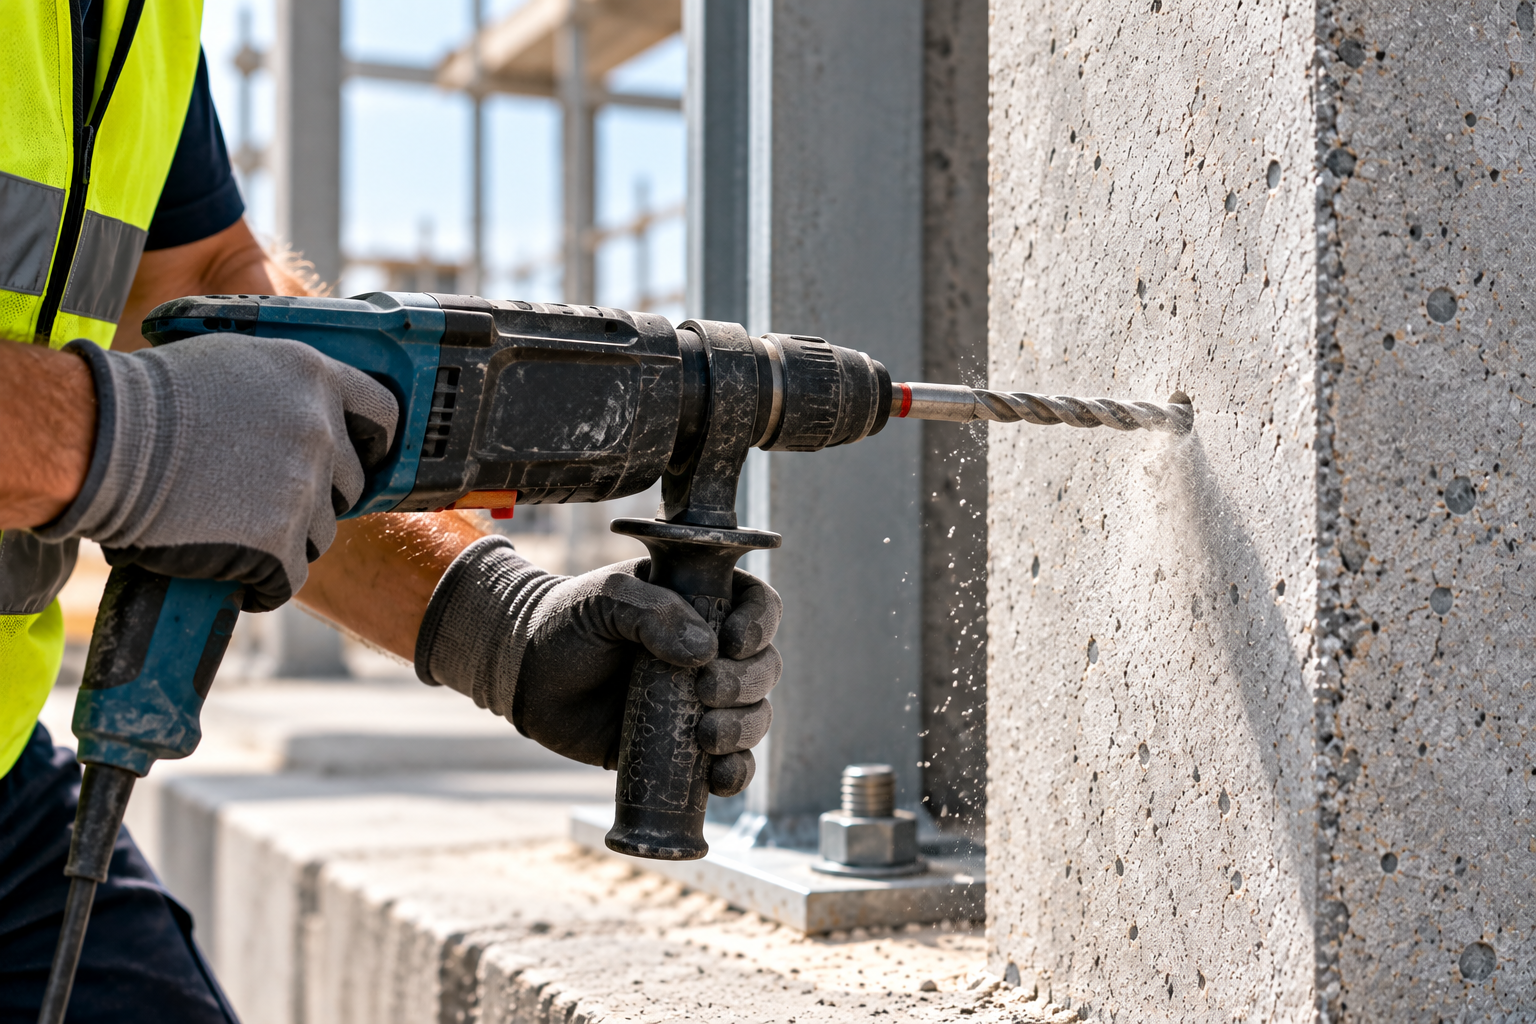
Use the appropriate drilling equipment and drill bit to create the hole.
The hole diameter and embedment depth must follow the chemical anchor manufacturer’s specifications for the particular anchor size and application.
Drilling the hole too shallow or using an incorrect diameter can affect the performance of the anchoring system.
Once drilling is complete, remove loose dust and debris before proceeding to the cleaning stage.
Step 3: Clean the Hole Thoroughly
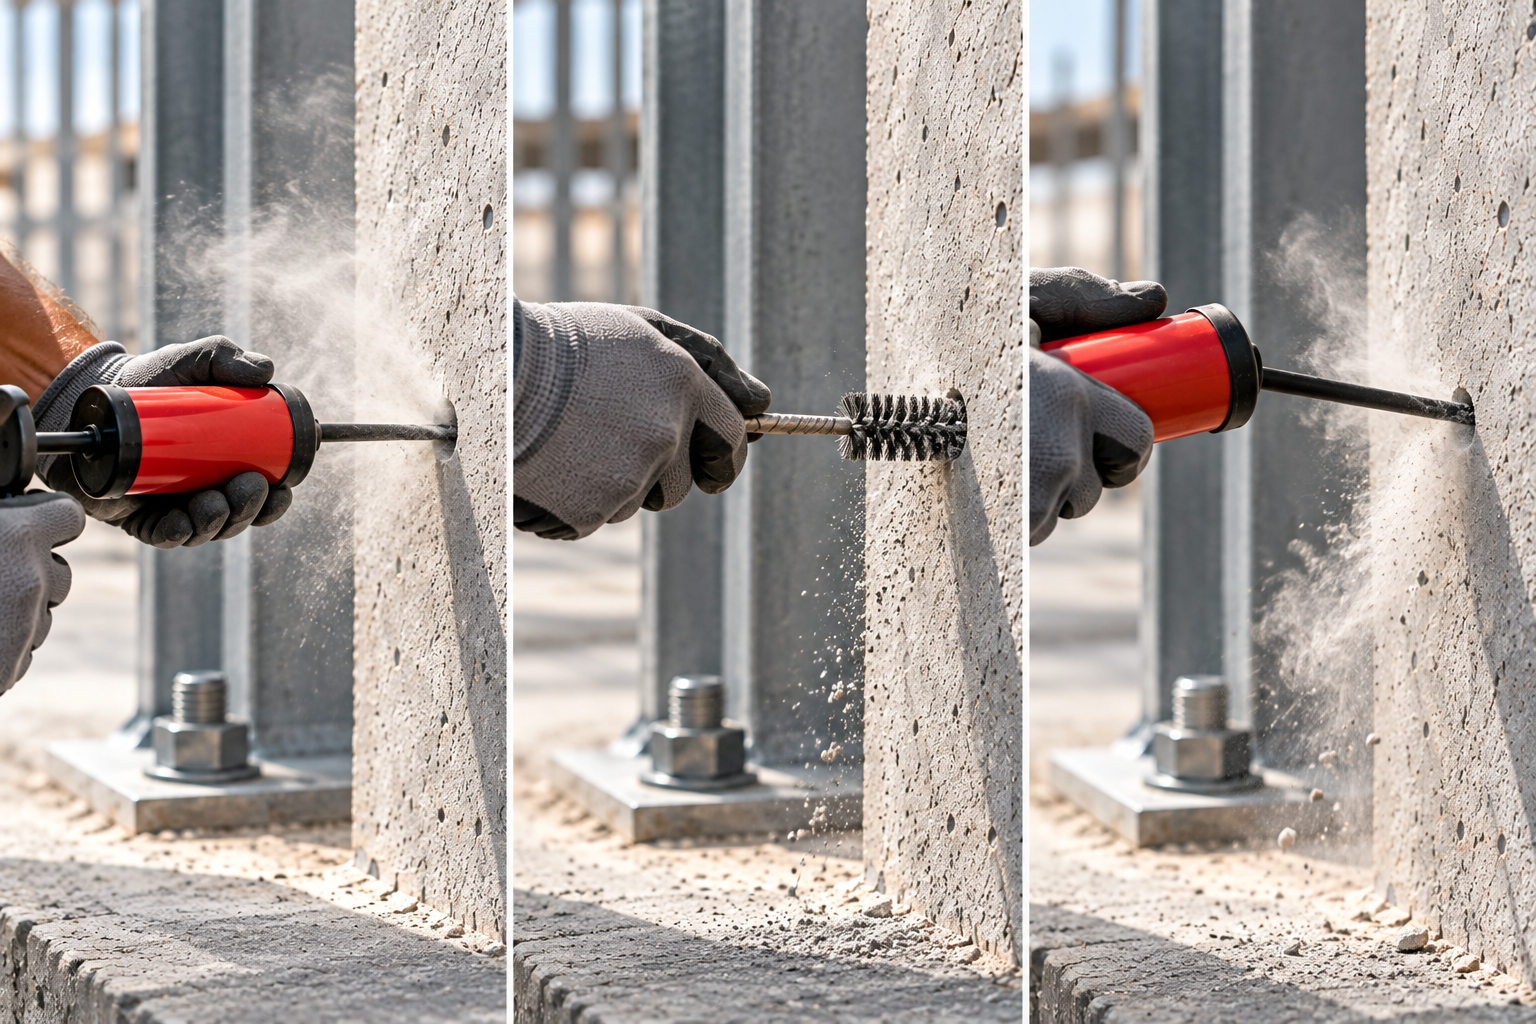
Hole cleaning is one of the most important steps in chemical anchor installation.
Drilling creates dust and loose particles inside the hole. If these contaminants remain on the surface of the hole, they can interfere with the bond between the adhesive and concrete.
Many chemical anchoring systems specify a cleaning sequence involving:
Blow → Brush → Blow
1. Blow
Start from the back of the hole and remove loose dust using an appropriate blow-out pump or suitable compressed air system.
Work from the bottom of the hole outward so that dust and debris are expelled rather than pushed further into the hole.
2. Brush
Use the correct diameter hole-cleaning brush to remove particles attached to the sides of the drilled hole.
The brush should be appropriate for the hole diameter and installation system.
3. Blow Again
Blow the hole again to remove the loosened dust and debris.
Continue the cleaning process according to the manufacturer’s specified procedure.
The exact cleaning method can vary depending on the chemical anchor system, hole diameter, embedment depth and substrate condition.
After cleaning, make sure the hole does not become contaminated again before adhesive injection.
Step 4: Prepare the Chemical Anchor Cartridge
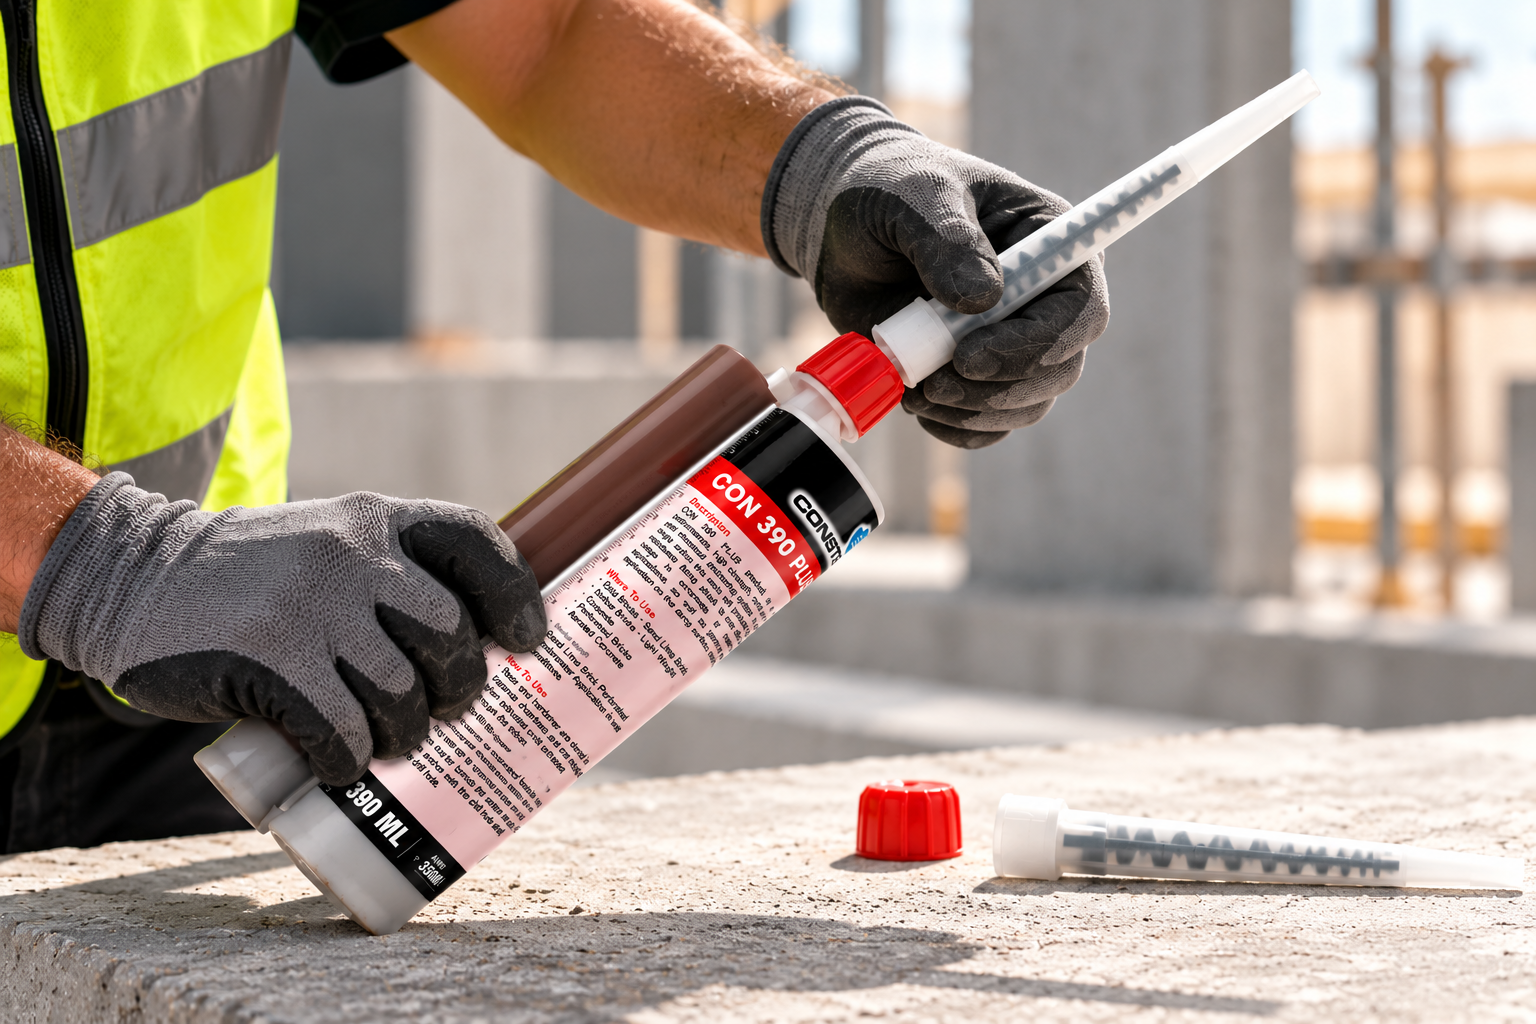
Install the chemical anchor cartridge into the correct dispensing gun and attach the supplied static mixing nozzle.
Chemical anchor cartridges commonly contain two components that must be properly mixed before the adhesive enters the drilled hole.
Before injecting the adhesive into the hole, dispense and discard the initial material until the resin has reached the uniform appearance specified by the manufacturer.
This step is important because improperly mixed resin may not develop the intended performance.
Always follow the cartridge manufacturer’s instructions regarding nozzle use and dispensing.
Step 5: Inject the Chemical Anchor Resin
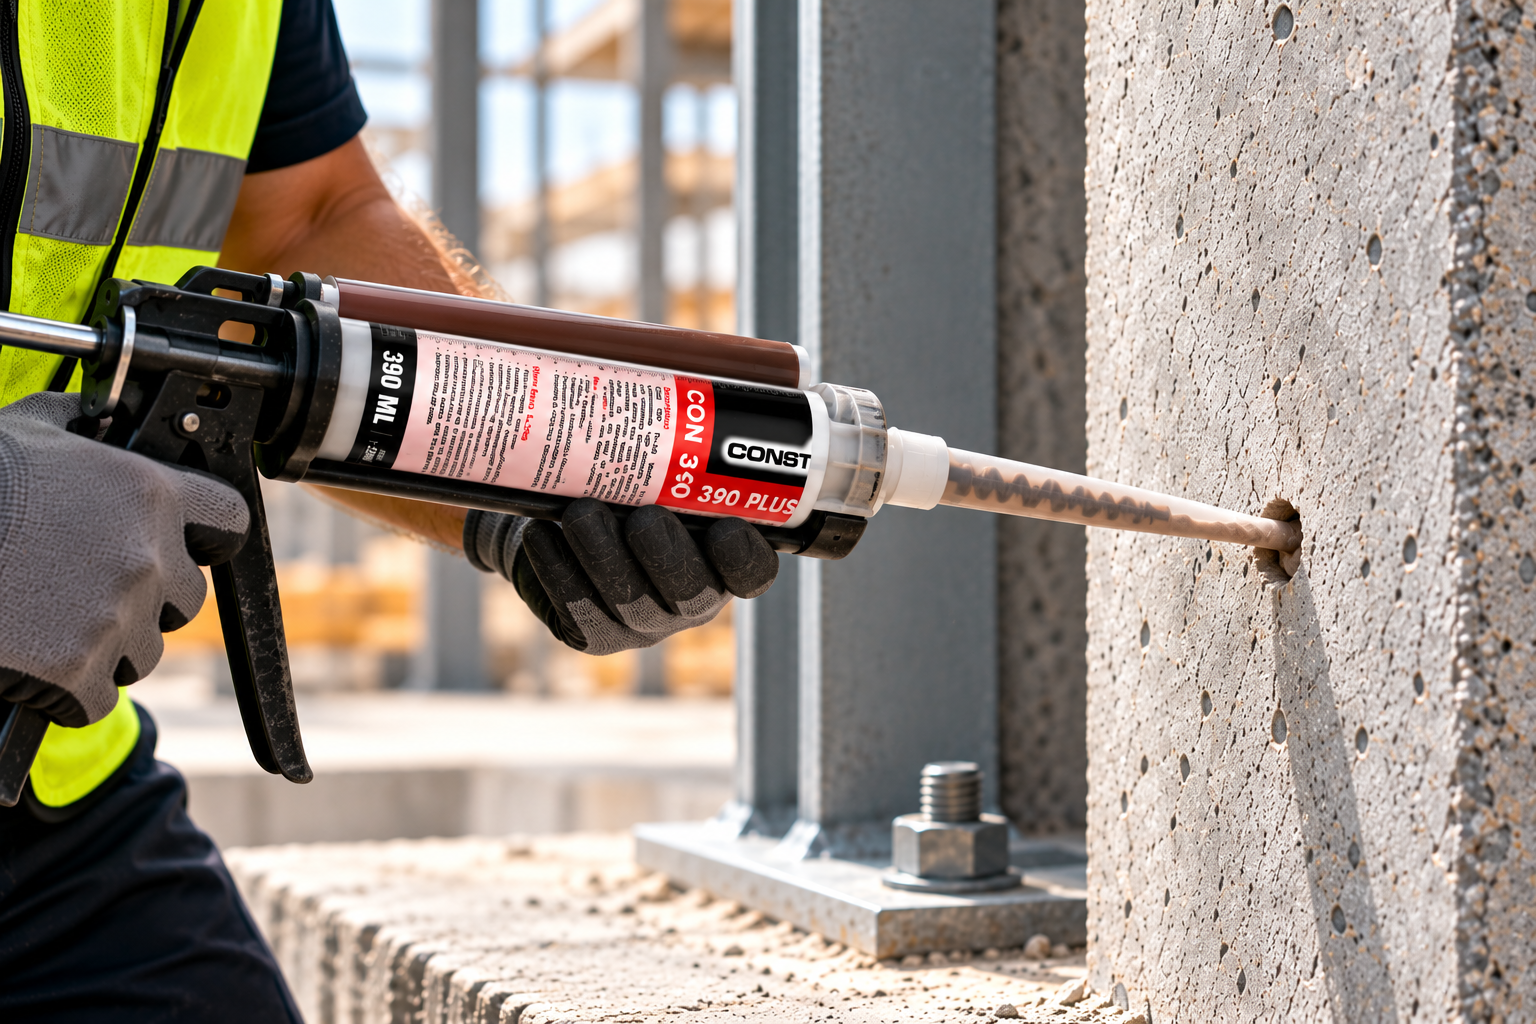
Insert the static mixing nozzle toward the back of the cleaned hole.
Begin dispensing the chemical anchor resin from the bottom of the hole while gradually withdrawing the nozzle.
This method helps reduce the possibility of creating air pockets within the adhesive.
The required quantity of resin depends on the hole diameter, hole depth, anchor diameter and the specific anchoring system.
Some systems require partial filling rather than filling the entire hole.
Do not guess the required quantity of chemical anchor resin. Follow the manufacturer’s installation instructions.
Step 6: Insert the Threaded Rod or Rebar
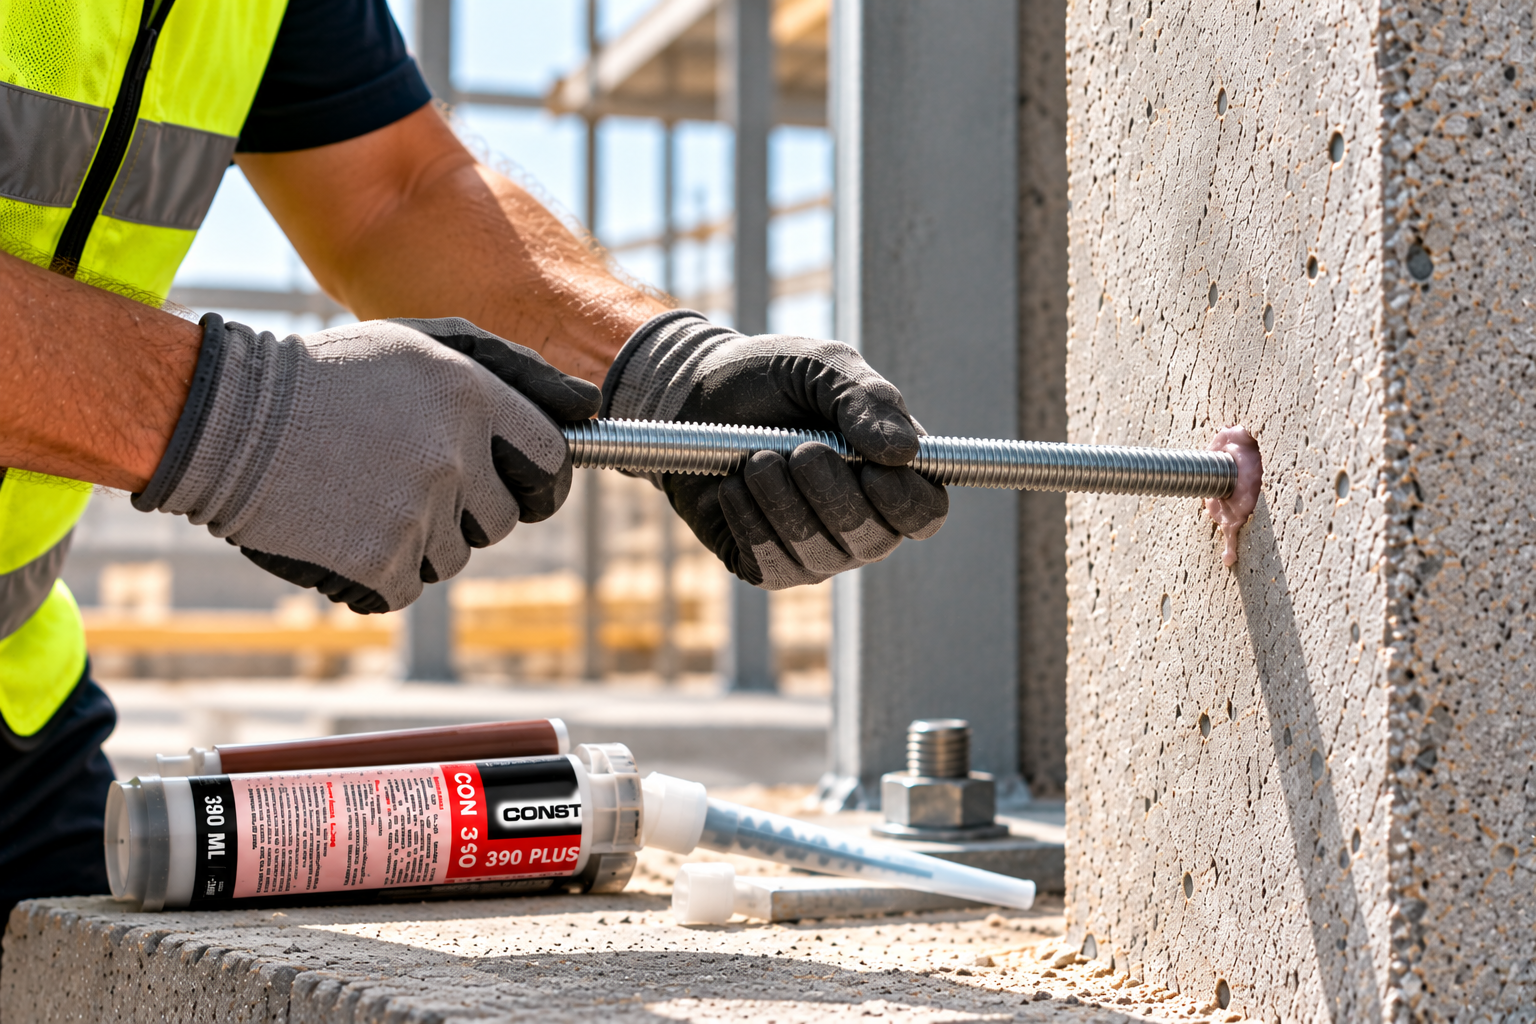
Before insertion, make sure the threaded rod, rebar or other approved anchor element is clean and free from oil, grease, dirt and other contaminants.
Insert the anchor element into the resin-filled hole.
A slow twisting motion during insertion can help distribute the adhesive around the anchor element as it reaches the required embedment depth.
Marking the required embedment depth on the threaded rod before installation can make it easier to confirm that the anchor has been inserted correctly.
Some excess resin may appear around the mouth of the hole after insertion. Follow the product instructions for handling excess adhesive.
Once the anchor has been positioned correctly, leave it undisturbed.
Step 7: Allow the Chemical Anchor to Cure
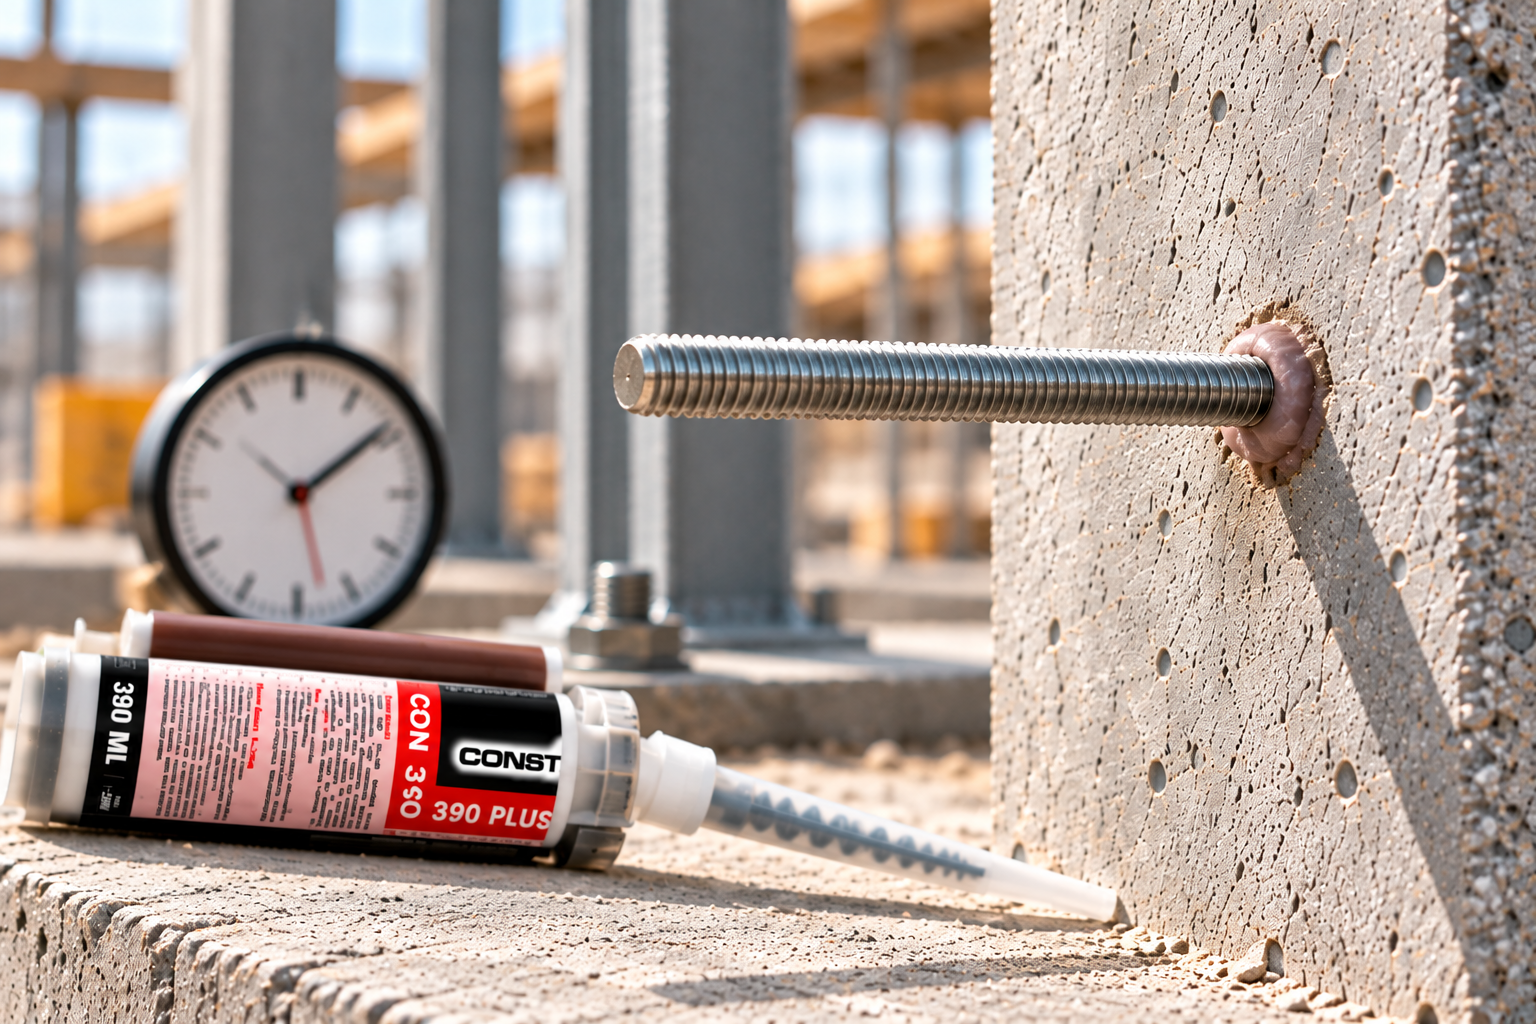
Do not rush the curing stage.
After inserting the anchor, do not move, tighten or load it until the chemical anchor has reached the required curing condition.
The curing time can vary depending on:
- Chemical anchor formulation
- Resin type
- Concrete temperature
- Ambient temperature
- Anchor diameter
- Installation conditions
- Moisture conditions
- Product specifications
There is therefore no single universal curing time for every chemical anchor.
Always check the product’s technical data sheet for the applicable working time and curing time.
Until the specified curing period has been completed, the anchor should remain undisturbed.
Step 8: Install the Fixture and Apply Torque
Once the chemical anchor has reached the required curing condition, the fixture, bracket, plate or other component can be installed.
Where the installation requires a specified tightening torque, use a calibrated torque wrench and follow the manufacturer’s recommended torque value.
Do not apply the final load or specified torque before the required curing period has been completed.
For structural applications, installation and loading should follow the applicable design requirements and technical documentation.
How Long Does a Chemical Anchor Take to Cure?
The curing time of a chemical anchor depends on the specific product and installation conditions.
Important factors include:
- Resin formulation
- Concrete temperature
- Ambient temperature
- Moisture conditions
- Anchor diameter
- Installation conditions
Some chemical anchoring systems may have relatively short curing periods under suitable conditions, while others require longer periods.
For this reason, never use a generic curing time when installing a chemical anchor.
Always refer to the manufacturer’s technical data sheet for the product-specific working time and curing schedule.
How Much Chemical Anchor Resin Is Required?
The amount of resin required for each anchor depends on several factors, including:
- Hole diameter
- Hole depth
- Anchor diameter
- Required embedment depth
- Annular space between the anchor and concrete
- Required fill volume
- Chemical anchor system
The cartridge size alone does not determine how many anchors can be installed.
For accurate material estimation, use the manufacturer’s consumption information or the installation specifications provided for the selected chemical anchor system.
Why Is Hole Cleaning Important for Chemical Anchors?
Hole cleaning directly affects the interface between the adhesive and the concrete.
When a hole is drilled, dust and loose particles can remain attached to the hole walls. If they are not properly removed, they can interfere with adhesive contact.
This is why chemical anchor installation procedures commonly emphasize proper cleaning before resin injection.
A typical cleaning sequence is:
Blow → Brush → Blow
However, the exact cleaning procedure should always be based on the manufacturer’s installation instructions.
5 Common Chemical Anchor Installation Mistakes
Even a high-performance chemical anchor can underperform if the installation procedure is not followed correctly.
1. Not Cleaning the Hole Properly
Leaving drilling dust inside the hole can interfere with the contact between the adhesive and concrete.
Solution: Follow the specified hole-cleaning procedure before injecting the resin.
2. Using the Wrong Hole Diameter
The hole diameter must correspond to the requirements of the selected chemical anchor and anchor element.
Solution: Always check the manufacturer’s technical documentation before drilling.
3. Using the Incorrect Embedment Depth
Insufficient or incorrect embedment can affect anchoring performance.
Solution: Mark and verify the required embedment depth before inserting the anchor element.
4. Using Improperly Mixed Resin
Chemical anchor systems that use multiple resin components require proper mixing through the static nozzle.
Solution: Dispense and discard the initial material according to the manufacturer’s instructions until the mixture is uniform.
5. Loading the Anchor Before Full Cure
Moving, tightening or loading the anchor before the adhesive has sufficiently cured can compromise the installation.
Solution: Follow the product-specific curing schedule and keep the anchor undisturbed during curing.
Chemical Anchor Installation Checklist
Use this checklist before considering the installation complete:
☐ Correct chemical anchor system selected
☐ Concrete condition checked
☐ Correct drilling diameter used
☐ Correct embedment depth achieved
☐ Hole thoroughly cleaned
☐ Anchor element cleaned
☐ Resin properly mixed
☐ Initial mixed resin discarded as specified
☐ Chemical anchor injected from the back of the hole
☐ Correct quantity of resin used
☐ Anchor inserted to the required embedment depth
☐ Anchor left undisturbed during curing
☐ Required curing time completed
☐ Fixture installed correctly
☐ Final torque applied according to specifications
What Affects Chemical Anchor Performance?
The final performance of a chemical anchoring system depends on more than the resin itself.
Important factors include:
Concrete Condition
The strength, condition and characteristics of the concrete can affect the anchoring system.
Hole Diameter
The hole must be drilled according to the specified diameter for the selected anchor system.
Embedment Depth
The anchor must be installed to the required embedment depth.
Hole Cleaning
Dust and debris should be removed according to the specified cleaning procedure.
Adhesive Mixing
The resin components must be properly mixed before entering the hole.
Anchor Installation
The anchor element must be inserted correctly and positioned at the required embedment depth.
Curing
The adhesive must be allowed to cure for the specified period before the anchor is moved, tightened or loaded.
Installation Conditions
Temperature, moisture and other environmental conditions can affect working and curing times.
Can Chemical Anchors Be Used for Rebar Dowelling?
Yes, chemical anchoring systems can be used for rebar dowelling applications when the selected product is specifically approved and designed for that purpose.
The installation requirements can vary depending on:
- Rebar diameter
- Required embedment
- Concrete condition
- Resin type
- Design loads
- Environmental conditions
- Applicable project requirements
For structural rebar connections, the system should be properly designed and installed according to the applicable technical requirements.
Can Chemical Anchors Be Used in Cracked Concrete?
Some chemical anchoring systems are specifically designed and tested for use in cracked concrete, while others may have different application limitations.
Therefore, the phrase “chemical anchor” does not automatically mean that every product is suitable for cracked concrete.
Check the product’s technical documentation, approvals and intended applications before using it in cracked concrete or other demanding structural conditions.
Chemical Anchor Installation for Structural Applications
For structural, heavy-load or safety-critical applications, chemical anchor installation should not be treated as a simple DIY fixing procedure.
The anchoring system should be selected based on factors such as:
- Applied loads
- Concrete strength
- Anchor diameter
- Embedment depth
- Edge distance
- Anchor spacing
- Environmental exposure
- Temperature
- Cracked or uncracked concrete conditions
- Required approvals and standards
Where required, the anchoring design and installation should be reviewed by an appropriately qualified professional.
Why Proper Chemical Anchor Installation Matters
A chemical anchor is not simply a cartridge of resin placed inside a drilled hole.
The final anchoring performance depends on the interaction between the:
Concrete + Drilled Hole + Adhesive + Anchor Element
Each part of the installation process contributes to this connection.
Correct drilling creates the required hole geometry. Proper cleaning prepares the concrete surface. Correctly mixed adhesive creates the intended bond, while accurate anchor insertion and sufficient curing allow the system to develop its specified performance.
This is why manufacturers place significant emphasis on installation procedures.
Conclusion
Installing a chemical anchor in concrete involves much more than drilling a hole and injecting resin. Correct drilling, thorough hole cleaning, proper adhesive mixing, accurate resin injection, correct anchor insertion and sufficient curing time are all essential parts of the installation process.
The exact requirements can vary depending on the chemical anchor system, anchor element, concrete condition and application. Always refer to the manufacturer’s technical documentation for the required hole diameter, embedment depth, resin quantity, working time, curing time and tightening requirements.
For structural, heavy-load or safety-critical applications, the anchoring system should be appropriately designed and installed according to the relevant project requirements and applicable standards.
Looking for a reliable chemical anchoring solution for your concrete fixing application? Explore Constromech’s range of chemical anchors or contact our team for product and application guidance.
Frequently Asked Questions
- What is a chemical anchor?
A chemical anchor is an adhesive anchoring system that uses resin to bond an anchor element, such as a threaded rod or rebar, inside a drilled hole in concrete.
- How do chemical anchors work?
A resin-based adhesive is injected into a prepared and cleaned hole. An approved anchor element is then inserted into the resin. After curing, the adhesive forms a bonded connection between the anchor and surrounding concrete.
- How do you install a chemical anchor in concrete?
The typical process is to mark the location, drill the hole, clean it thoroughly, prepare the cartridge, inject the resin, insert the anchor element, allow the adhesive to cure and then install the fixture and apply the specified torque.
- How long does a chemical anchor take to cure?
Curing time depends on the resin formulation and installation conditions, particularly temperature. Always follow the curing schedule provided in the manufacturer’s technical documentation.
- Why is hole cleaning important for chemical anchors?
Hole cleaning removes dust and loose particles created during drilling. Proper cleaning helps provide the required contact between the adhesive and concrete surface.
- Can chemical anchors be used with threaded rods?
Yes. Threaded rods are commonly used with chemical anchoring systems, provided that the rod and resin system are compatible and the installation follows the manufacturer’s specifications.
- Can chemical anchors be used for rebar?
Yes, certain chemical anchoring systems are designed for rebar dowelling and post-installed rebar applications. The selected product must be approved for the intended application.
- Your First FAQ QuestionYour relevent FAQ answer.
- Simple FAQSimple FAQ Content
- Simple FAQ - 2Simple FAQ Content - 2